We have created a simple playwright project that you can use to understand Playwright integration with Tuskr. In about an hour, you should be very familiar with the process. We have divided this tutorial in following steps.
- Setup
- Install the Tuskr CLI program
- Download and Install the Sample Playwright project
- Get Tuskr ready to receive results from Playwright
- Run the test in Playwright
- Verify integration with Tuskr
- Customize the integration
Setup
1. Install the Tuskr CLI program
On the machine running Playwright, install the tuskr npm module.
$ npm install -g tuskr
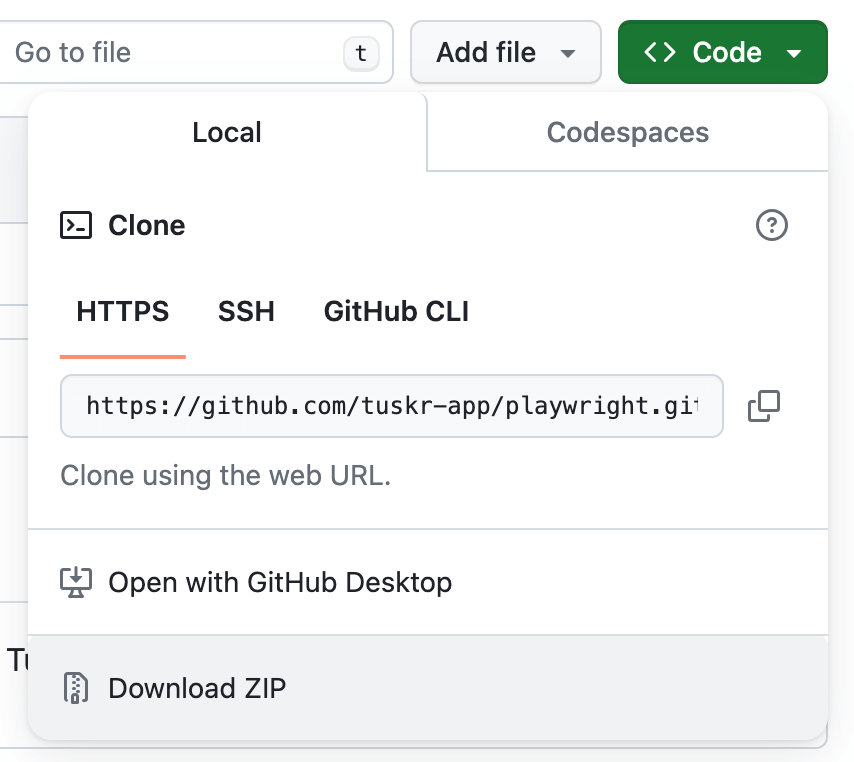
2. Download and Install the Sample Playwright project
Create a new folder in your environment and download the sample project from here.
 |- basic
 |- advanced-rules
 |- advanced-custom-fields
 |- playwright.config.ts
 |- ...
 |- package.json
Go to the downloaded sample project and install the project by running the below on the terminal:
$ npm install
3. Getting Tuskr Ready to Receive Results from Playwright
We need a project in Tuskr that is ready to receive the test results from Playwright. So let's create that project.
-
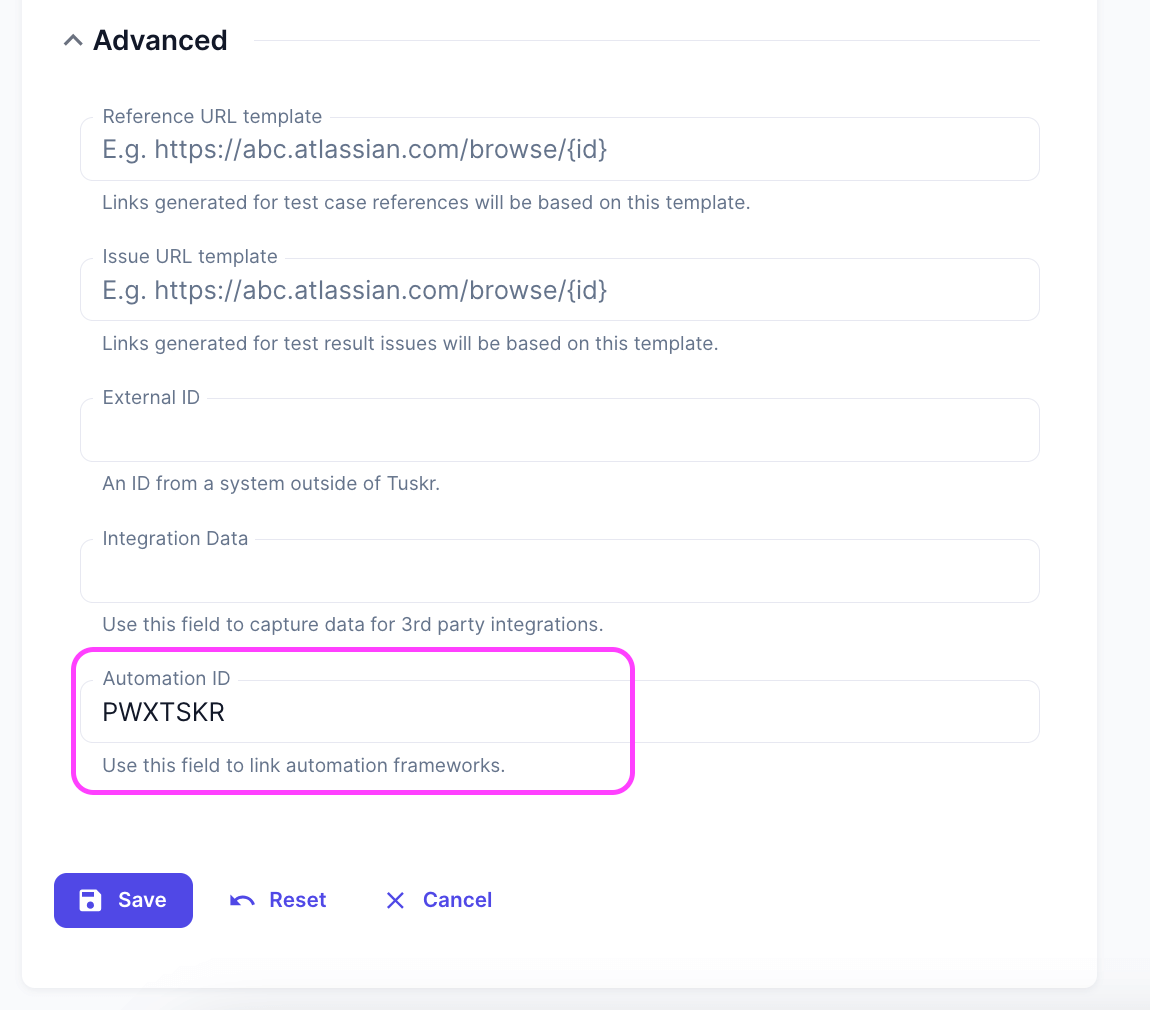
Create a project in Tuskr with the name: Playwright + Tuskr Integration Testing and Automation ID: PWXTSKR
-
Double-check that you have set its automation ID to PWXTSKR. This is important because the tuskr command in the Playwright sample project is set to use this ID.
-
Save the Project.
4. Run the test in Playwright
In the sample project, the default test directory is set to folder basic in
playwright.config.ts. So on running the playwright test command will execute all tests present inside
this folder.
npx playwright test
After the completion of the test, a results.xml file will be created similar to the one present in the
sample project.
Now, run the following command to send the test results to Tuskr.
tuskr --project='PWXTSKR' --test-run-name='Basic playwright test' --api-token='mckLTnq11qlX9ESp9JrETUMIzT4RMyqsJjPE0r2N' --file='results.xml' --test-case-rules='rules/test-case-rules-basic.json'
tuskr command not found.This means that the npm global install directory is not included in your system's PATH environment variable.
As a workaround, use the below command which uses npx(which comes with npm 5.2.0 and higher) to execute the tool:
$ npx tuskr --api-token --some-more-options
At the end of command execution, a URL will be displayed in the terminal which can be used to check the status of Junit XML import.

After successful import, a test run with the name "Basic playwright test" along with test cases, sections and suites will be created automaically if not found in Tuskr.
5. Verify that integration with Tuskr is successful
Login to tuskr and click on the Playwright + Tuskr Integration Testing project.
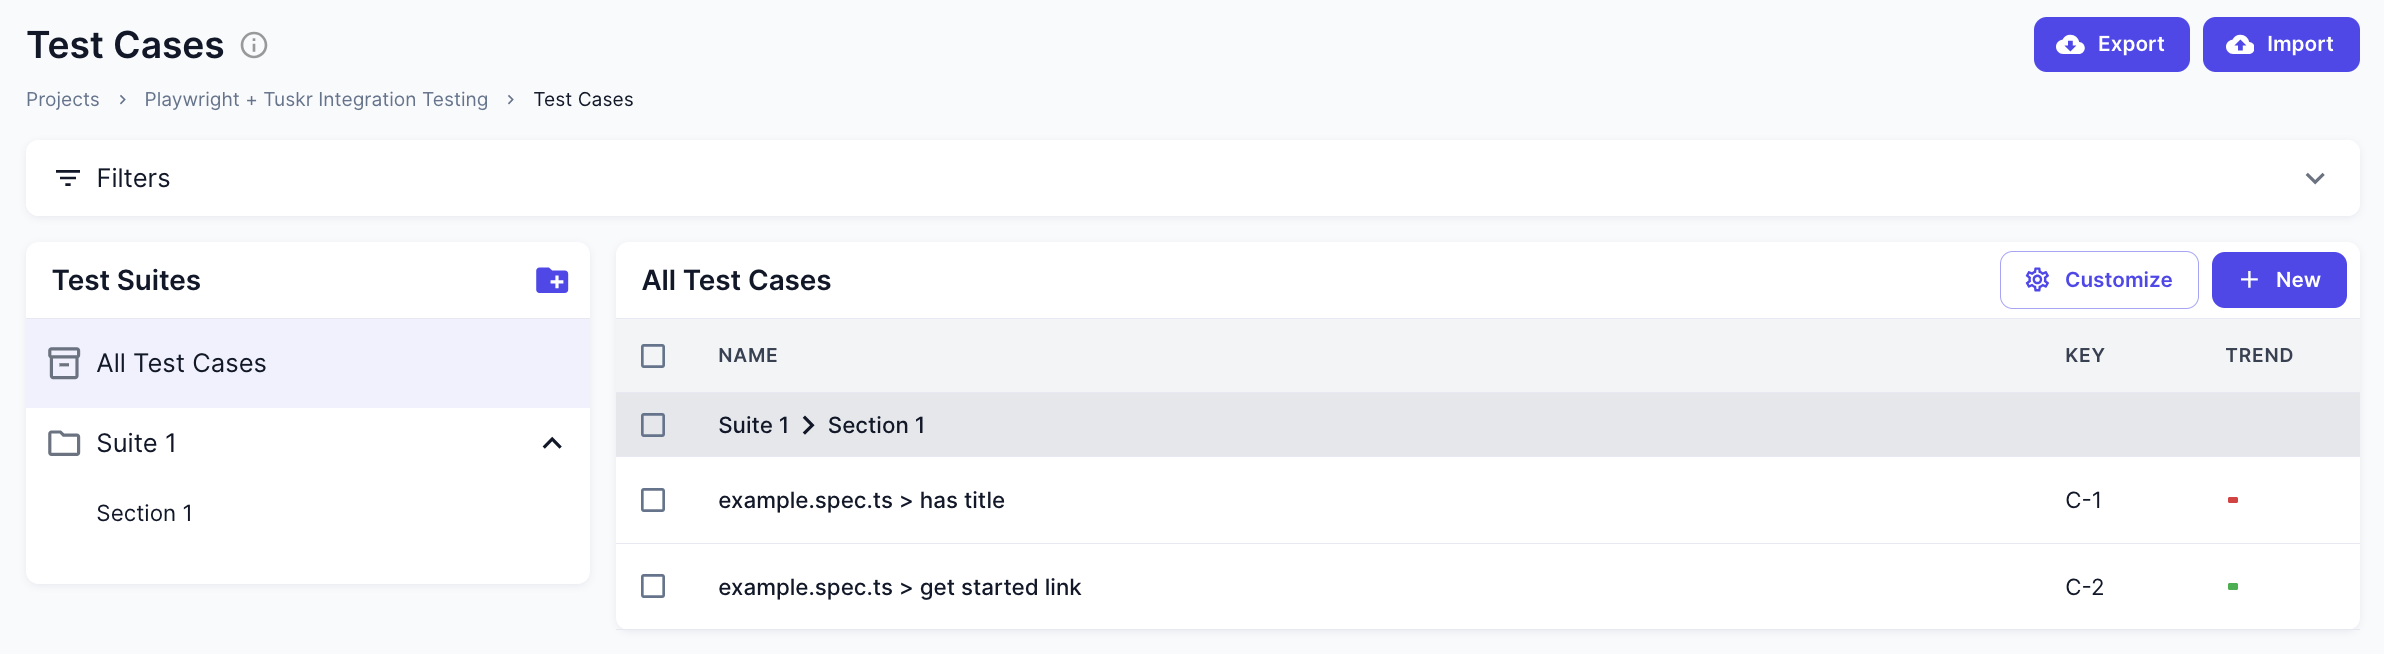
Verifying test cases were created
- Navigate to Test Cases page and you should see 2 test cases created.
- Name of the test case will be mapped to Automation ID field.
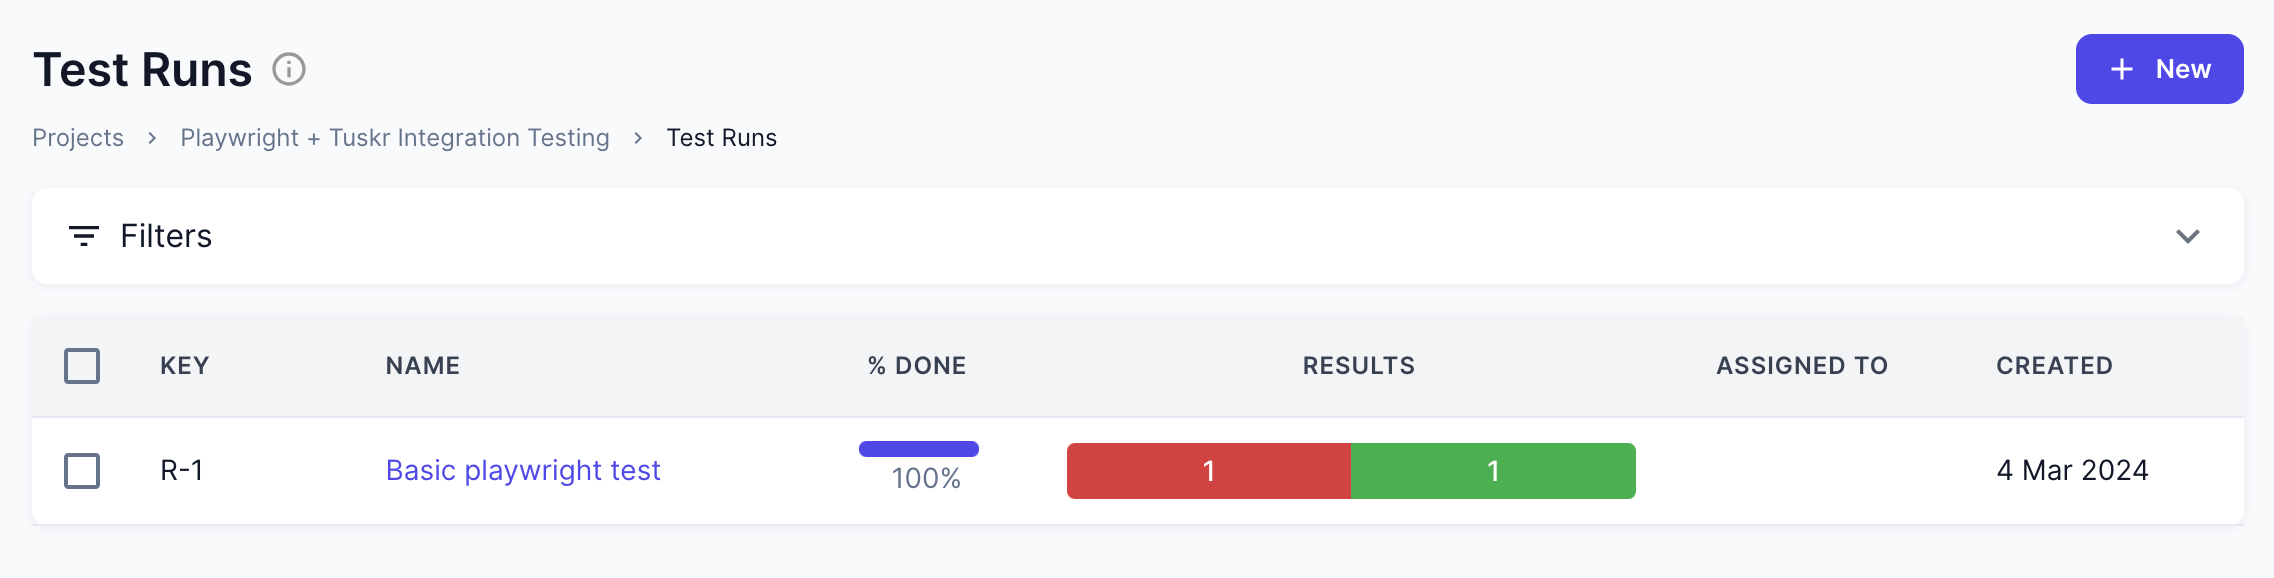
Verifying test results were imported
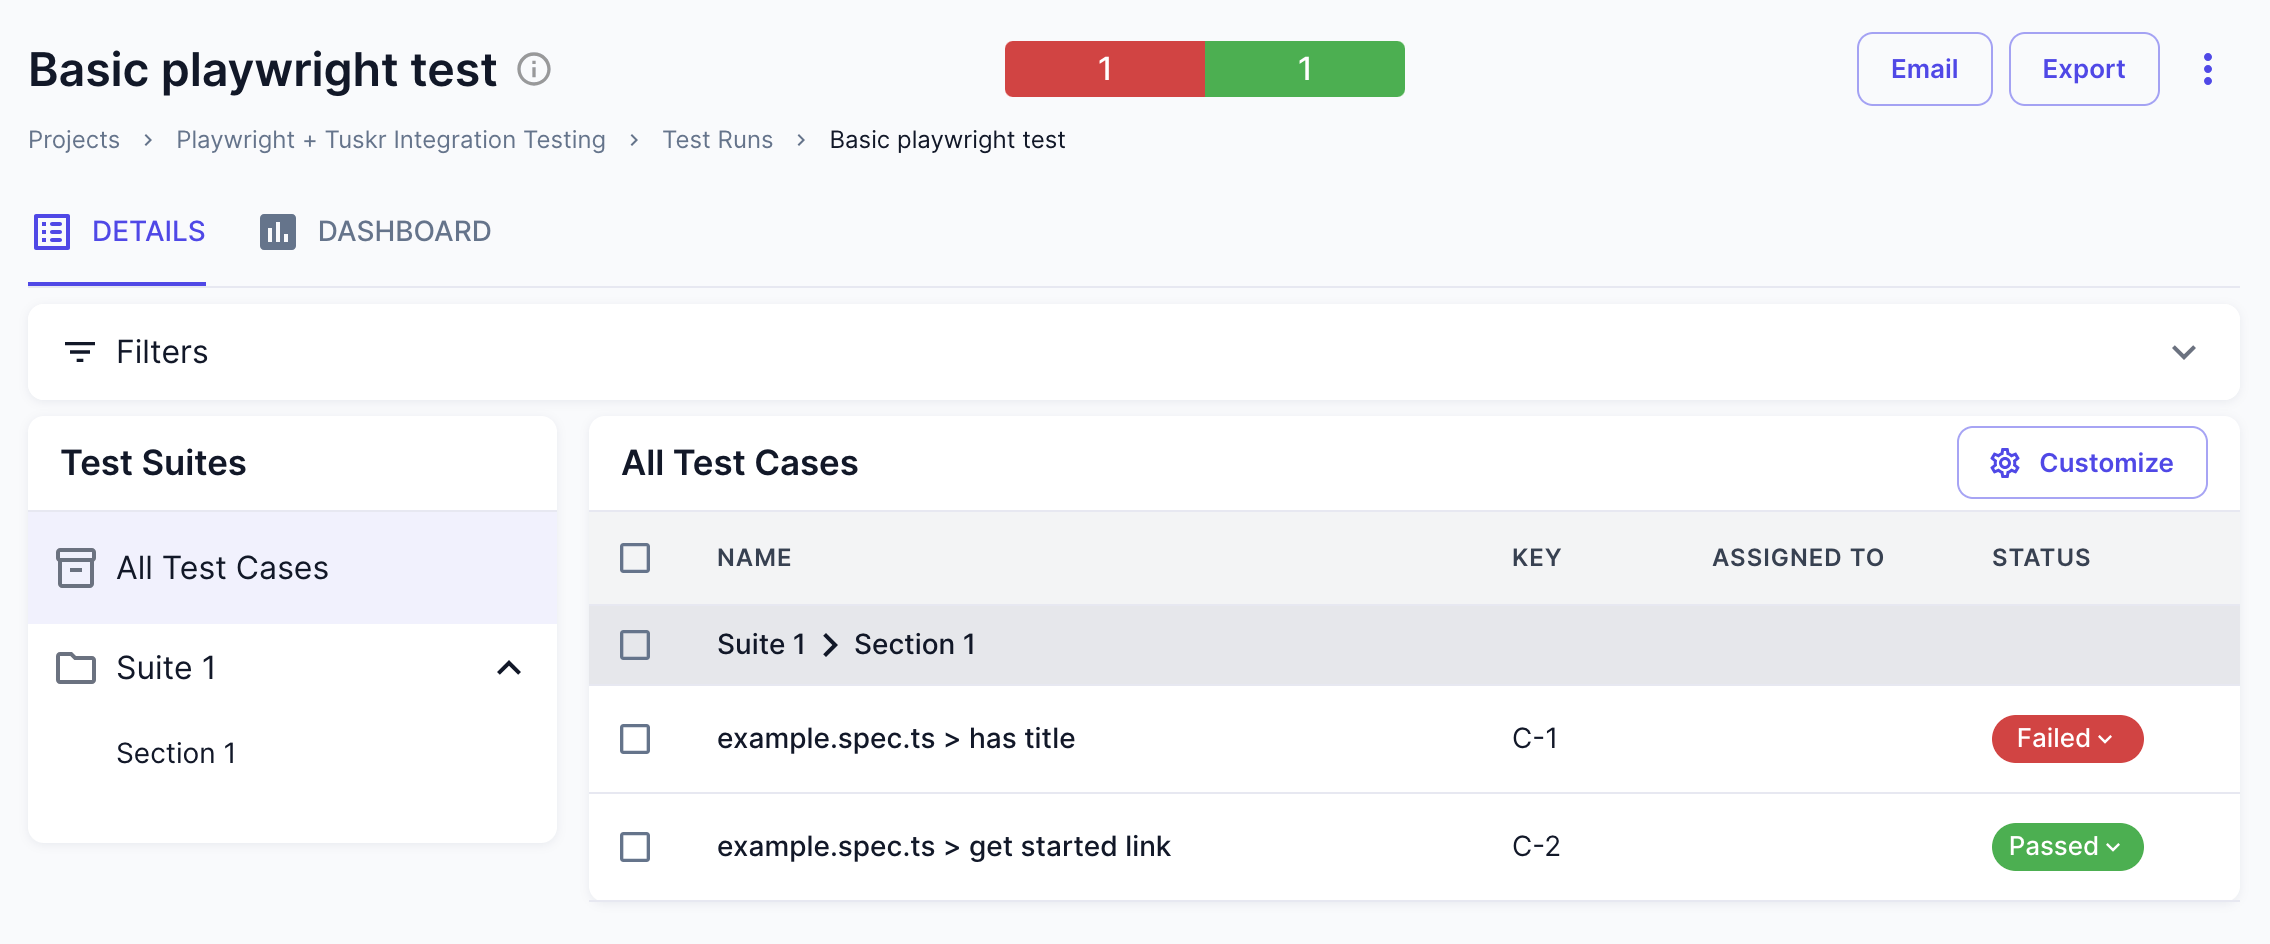
- Click on "Test Runs", you should see a test run like this:
- Click on the test run, you should see 2 test cases and their results like this:
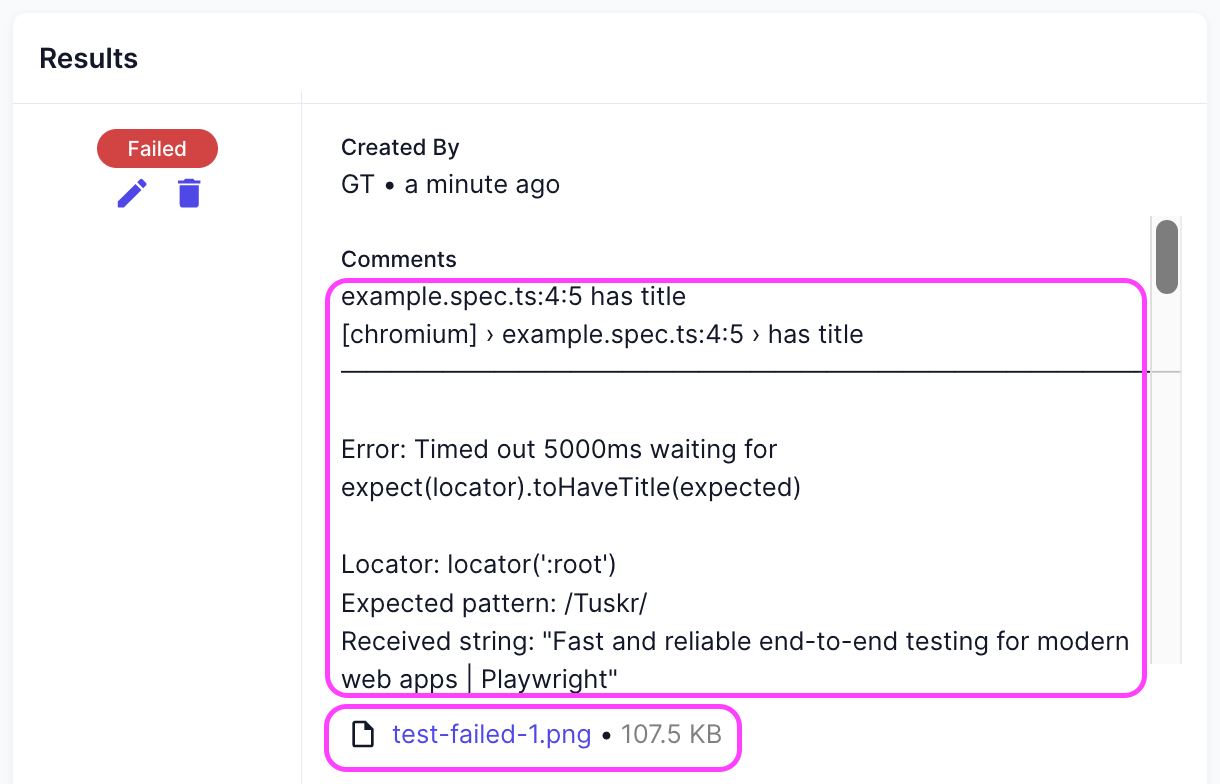
- Click on the failed test case and check the Results section, it will contain error details in the
Comments field and a screenshot attachment.
Existing test cases are found based on Automation ID field. If a test case is not found, then the classname and name attributes are combined. For ex., a non-existent test case having classname as login and name as wrong password then its automationId will be login.wrong password
Customise the Integration
Changing Test Case Automation IDs
If you set the Automation ID of a test case in Tuskr to XYZ, then you have to make sure that the
same test case in the XML has the same Automation ID.
This can be done either updating your test case rules
config or updating the properties on the same test case in XML file.
Changing the Test run Name
To change the test run name, simply update the --test-run-name argument in the command with the new test
run name. Remember, this would first try to update a test run with the same name else create a new test run.
Changing Project Automation IDs
Automation IDs are a stable and convenient way to share the project ID between Playwright and Tuskr. If you set the
Automation ID of a project in Tuskr to ABC, then you have to change the Tuskr command line argument
--project to ABC.
Changing Suites and Sections
Playwright has no concept of test suites and sections. But many want their test cases to be organised into suites and sections for better reporting and understanding just like we organise documents into different folders.
The best thing about Tuskr is that you can do so without bothering the developers. Let's do this:
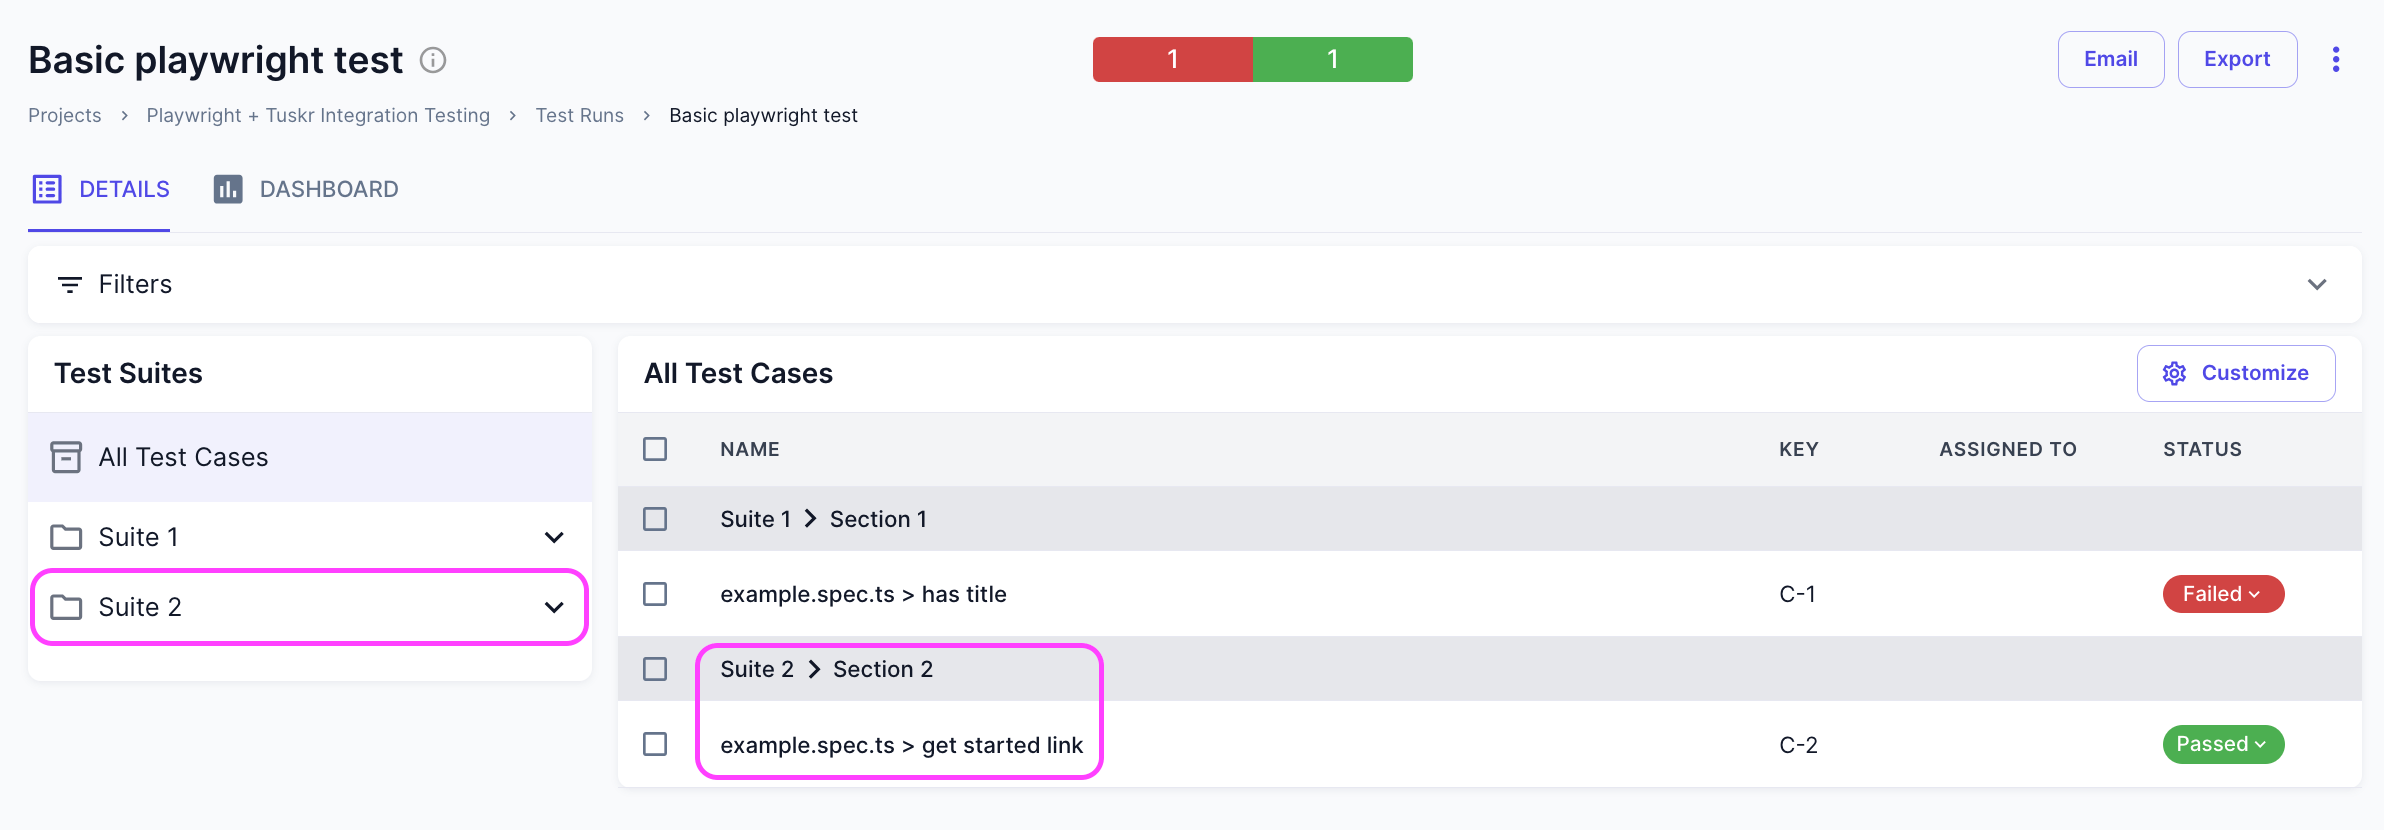
- For our second test case, let's set its suite to Suite 2 and its section to Section 2.
- Update the command to use
rules/test-case-rules-suite-section.jsonfor test case rules option. The JSON will be like this:{ "defaults": { "name": "{{classname}} > {{name}}", "testSuite": "Suite 1", "testSuiteSection": "Section 1", "automationId": "{{name}}" }, "name ~ link": { "testSuite": "Suite 2", "testSuiteSection": "Section 2" } } - What the above does is that if the name attribute contains link, then set its
suite to Suite 2 and its section to Section 2. You can read the Rules reference for more options.
Setting Custom Fields for test cases
Analysing test cases is important and custom fields provide a great way to assign attributes that are important to you to test cases. Just like we saw that we can assign suites and sections to test cases, we can set custom fields too without bothering the developers.
-
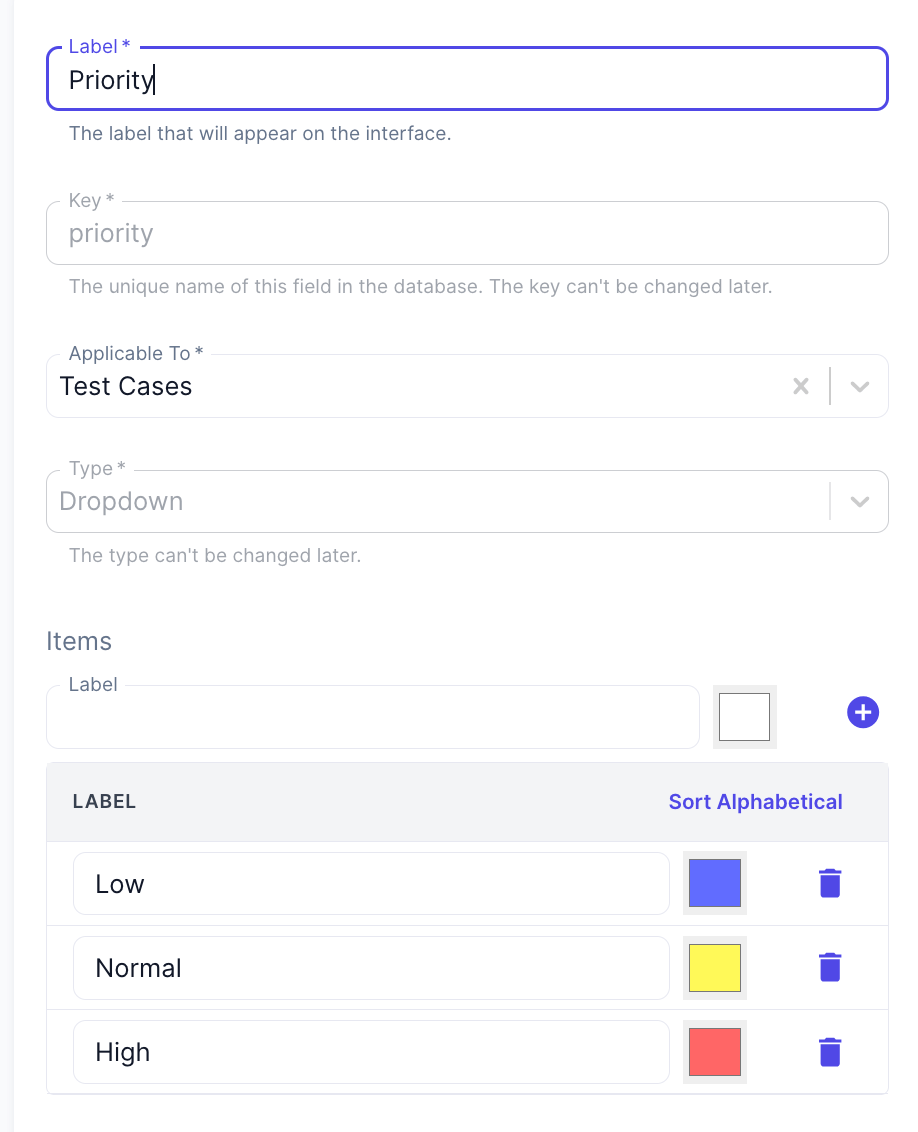
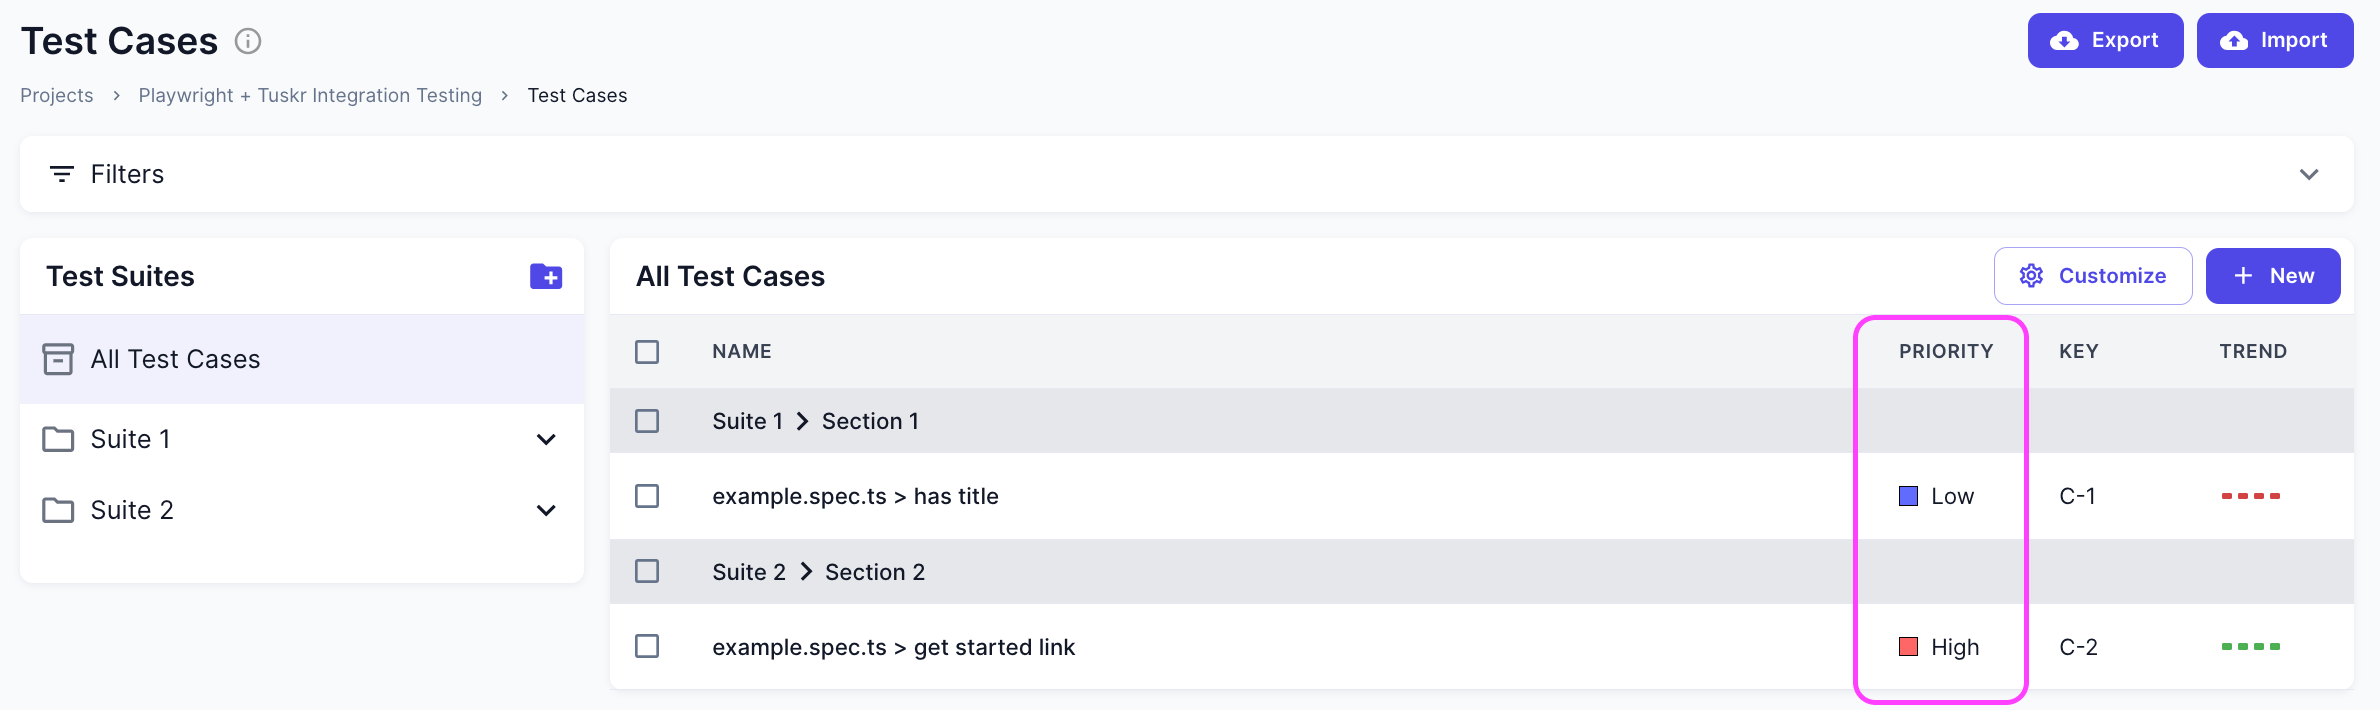
Let's create a new Dropdown custom field Priority with options as High, Normal and
Low.
- Update the command to use
rules/test-case-rules-custom-fields.jsonfor test case rules option. The JSON will be like this:{ "defaults": { "name": "{{classname}} > {{name}}", "testSuite": "Suite 1", "testSuiteSection": "Section 1", "automationId": "{{name}}" "customFields": { "priority": "Low" } }, "name ~ link": { "testSuite": "Suite 2", "testSuiteSection": "Section 2", "customFields": { "priority": "High" } } } -
This will set the Priority custom field value as "High" for all the test cases that match the rule.
Debugging:
API Token Error
Make sure that the API token is of a user having Admin privileges, else the import process will
throw error.
Make sure that a valid API token is in use.
Test Case Automation ID Not Found
During the import, Automation ID field of a test case is used to identify whether the test case exists in Tuskr. Based on this, decision is made to either create or update the test case. Make sure that for each test case in Junit XML file, Automation ID field is populated by using Rules to map attributes or by using <property> tag inside a test case.
Job Failed/Timed Out Errors
The CLI command creates a Job request in Tuskr. Tuskr then executes all new Job requests on a periodic bases. There could be multiple reasons due to which a Job is Failed or gets Timed Out. The error can be found out in the Details section of the Job page in Tuskr which can be accessed by Admin users from the Administration menu.


