We have created a simple Cypress project that you can use to understand Cypress integration with Tuskr. In about an hour, you should be very familiar with the process. We have divided this tutorial in following steps.
- Install the Tuskr CLI program
- Download and Install the Sample Cypress project
- Get Tuskr ready to receive results from Cypress
- Run the test in Cypress
- Verify integration with Tuskr
Setup
1. Install the Tuskr CLI program
On the machine running Cypress, install the tuskr npm module.
$ npm install -g tuskr
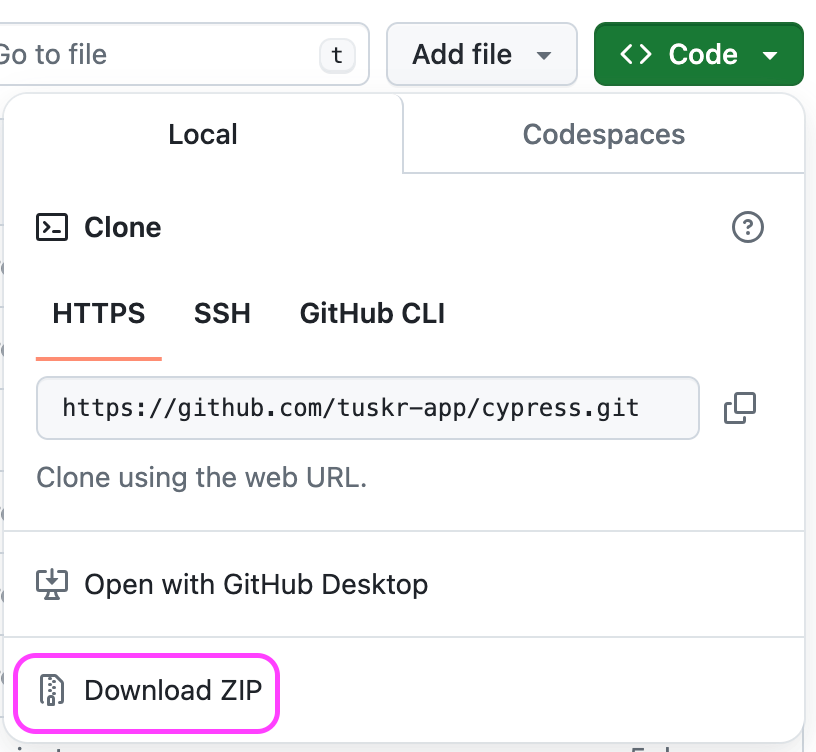
2. Download and Install the Sample Cypress project
Create a new folder in your environment and download the sample project from here.
   |- cypress
   |- cypress.config.js
   |- ...
   |- package.json
Go to the downloaded sample project and install the project by running the below on the terminal:
$ npm install
3. Getting Tuskr Ready to Receive Results from Cypress
We need a project in Tuskr that is ready to receive the test results from Cypress. So let's create that project.
-
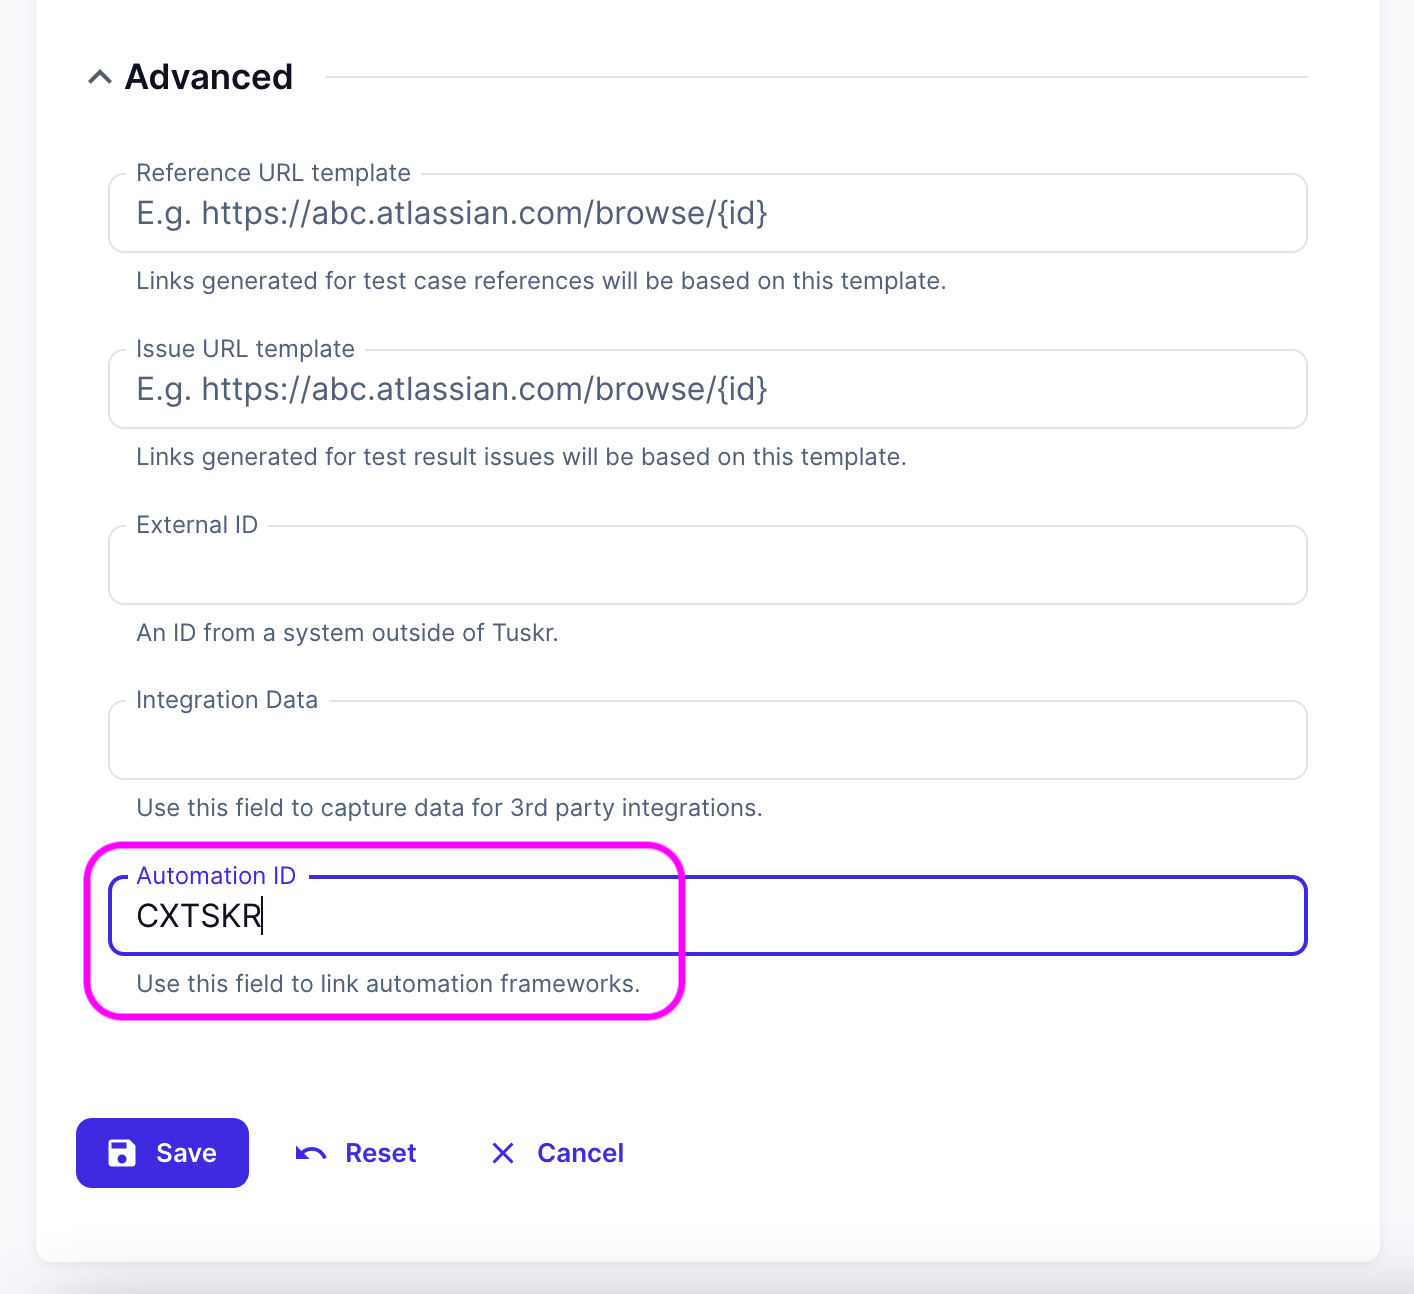
Create a project in Tuskr with the name: Cypress + Tuskr Integration Testing and Automation ID: CXTSKR
-
Double-check that you have set its automation ID to CXTSKR. This is important because the tuskr command in the Cypress sample project is set to use this ID.
-
Save the Project.
4. Run the test in Cypress
Running the cypress test command will execute all tests present inside this folder.
npx cypress run --spec cypress/e2e/1-getting-started
After the completion of the test, a TUSKR-[HASH].xml file will be created in the results folder.
We have configured the cypress.config.js to set the reporter as junit and the output
file should be named like this cypress/results/TUSKR-[hash].xml
Now, run the following command to send the test results to Tuskr.
tuskr --project='CXTSKR' --test-run-name='Basic Cypress test' --api-token='mckLTnq11qlX9ESp9JrETUMIzT4RMyqsJjPE0r2N' --file='cypress/results/TUSKR-*.xml' --test-case-rules='tuskr-rules.json'
tuskr command not found.This means that the npm global install directory is not included in your system's PATH environment variable.
As a workaround, use the below command which uses npx(which comes with npm 5.2.0 and higher) to execute the tool:
$ npx tuskr --api-token --some-more-options
At the end of command execution, a URL will be displayed in the terminal which can be used to check the status of Junit XML import.

After successful import, a test run with the name "Basic Cypress test" along with test cases, sections and suites will be created automaically if not found in Tuskr.
5. Verify that integration with Tuskr is successful
Login to tuskr and click on the Cypress + Tuskr Integration Testing project.
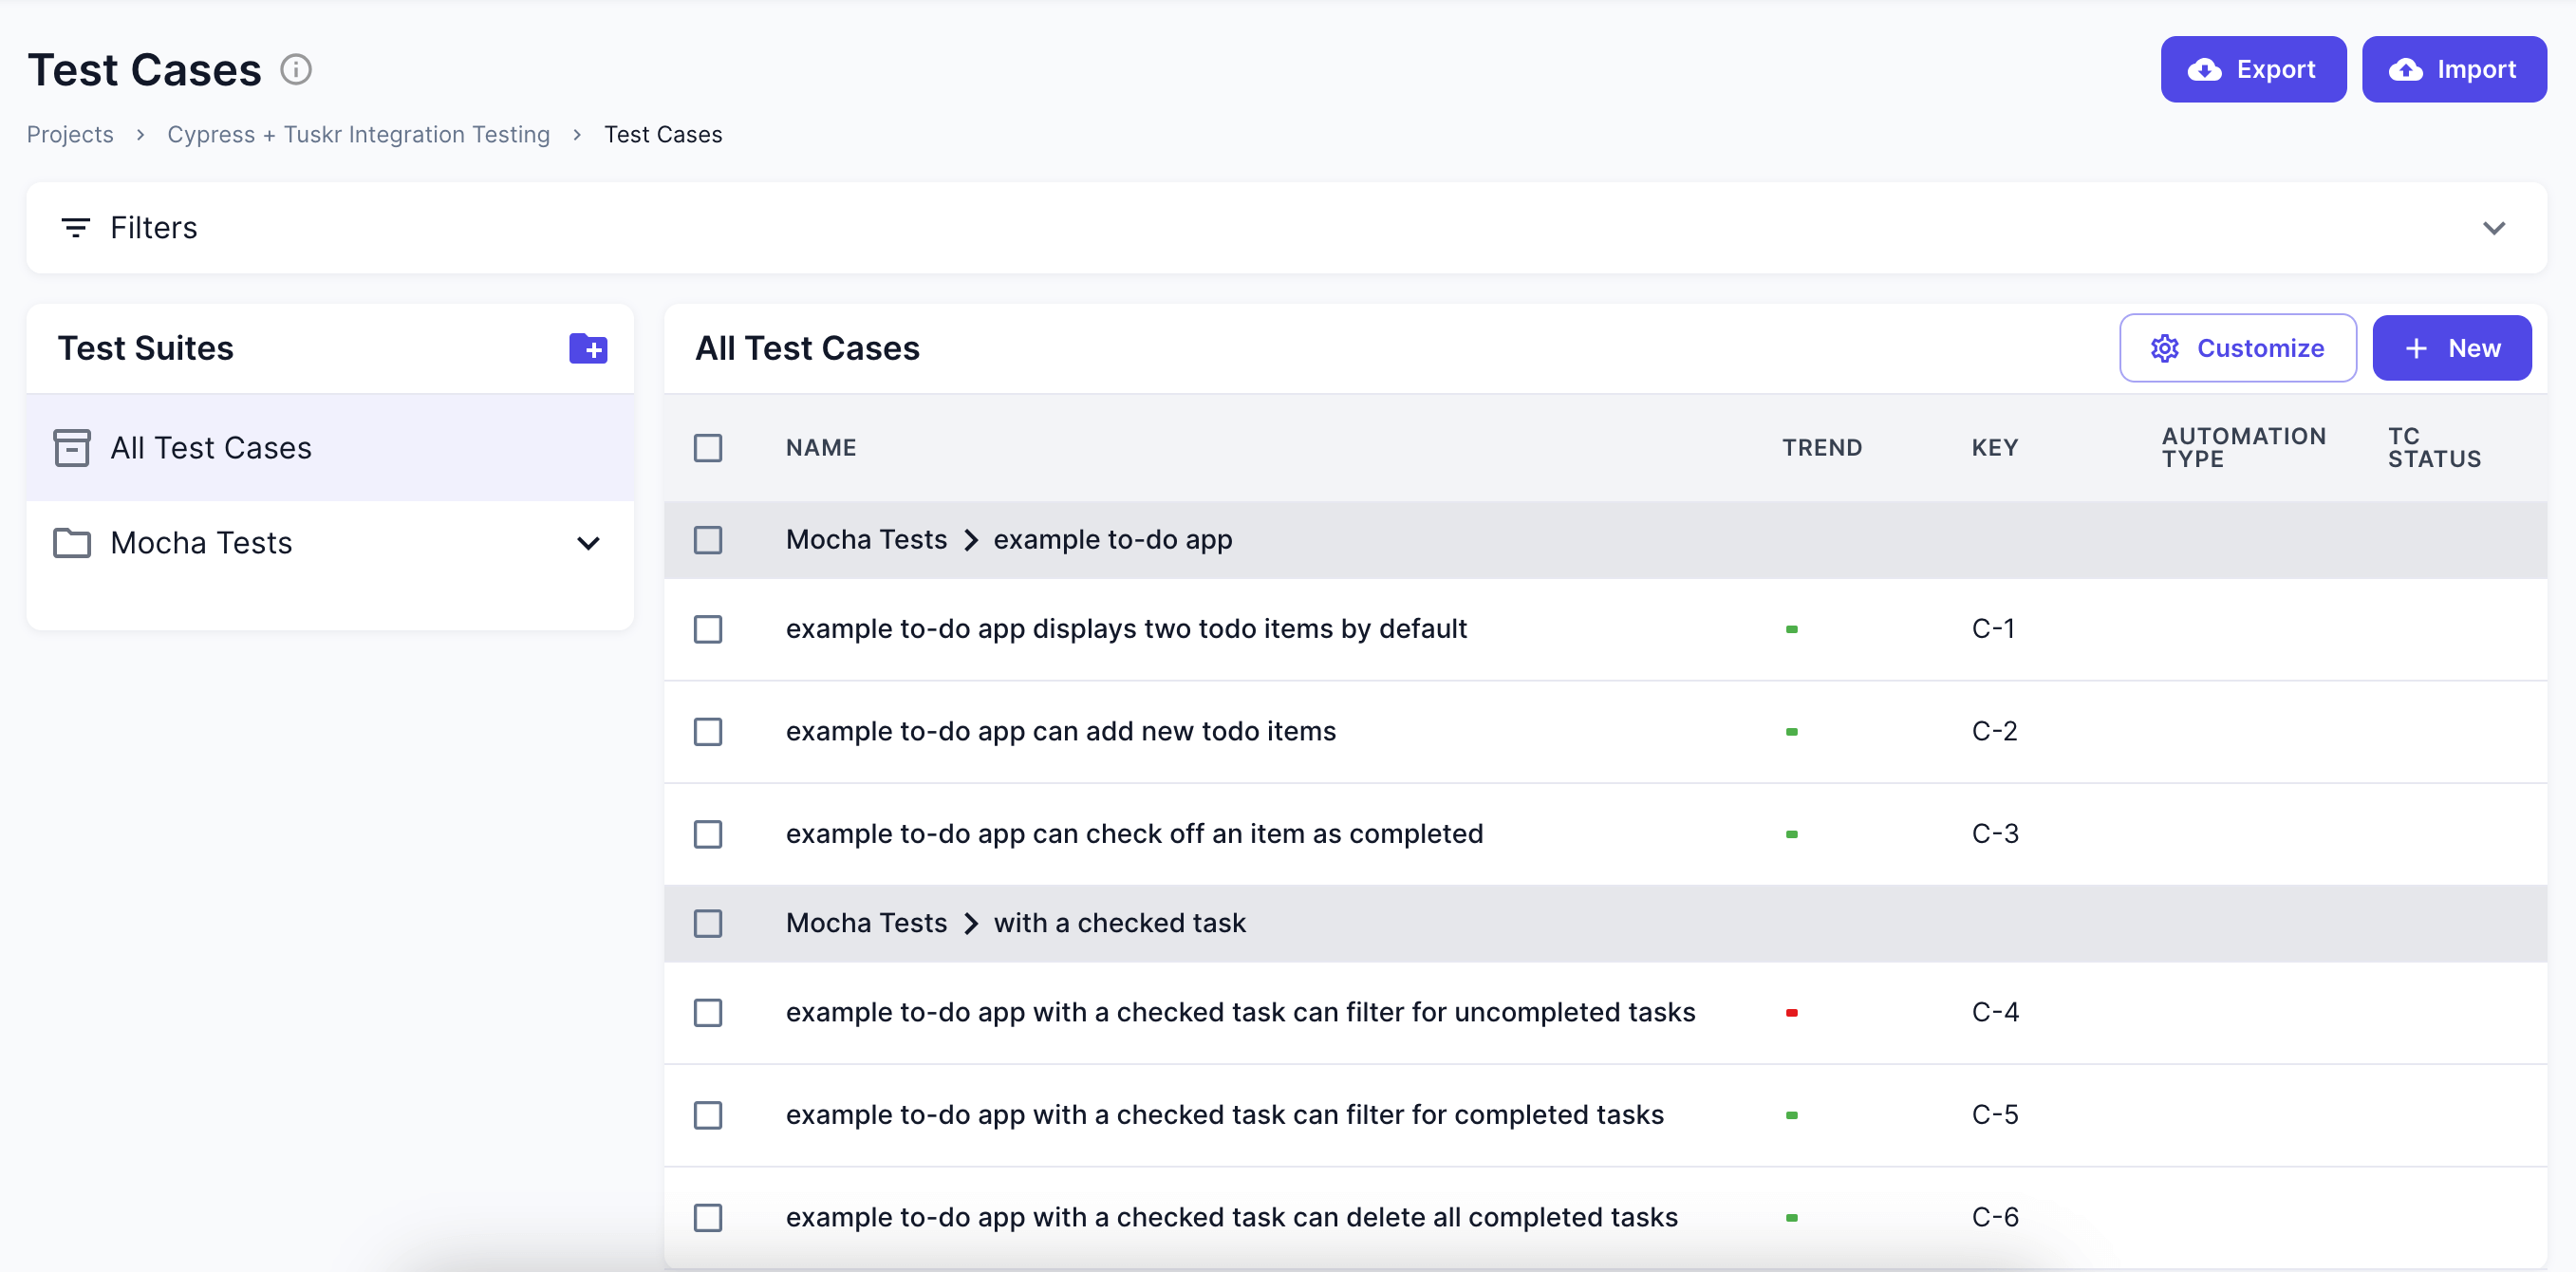
Verifying test cases were created
- Navigate to Test Cases page and you should see test cases created.
- Name of the test case will be mapped to Automation ID field.
Verifying test results were imported
- Click on "Test Runs", you should see a test run like this:

- Click on the test run, you should see test cases and their results like this:
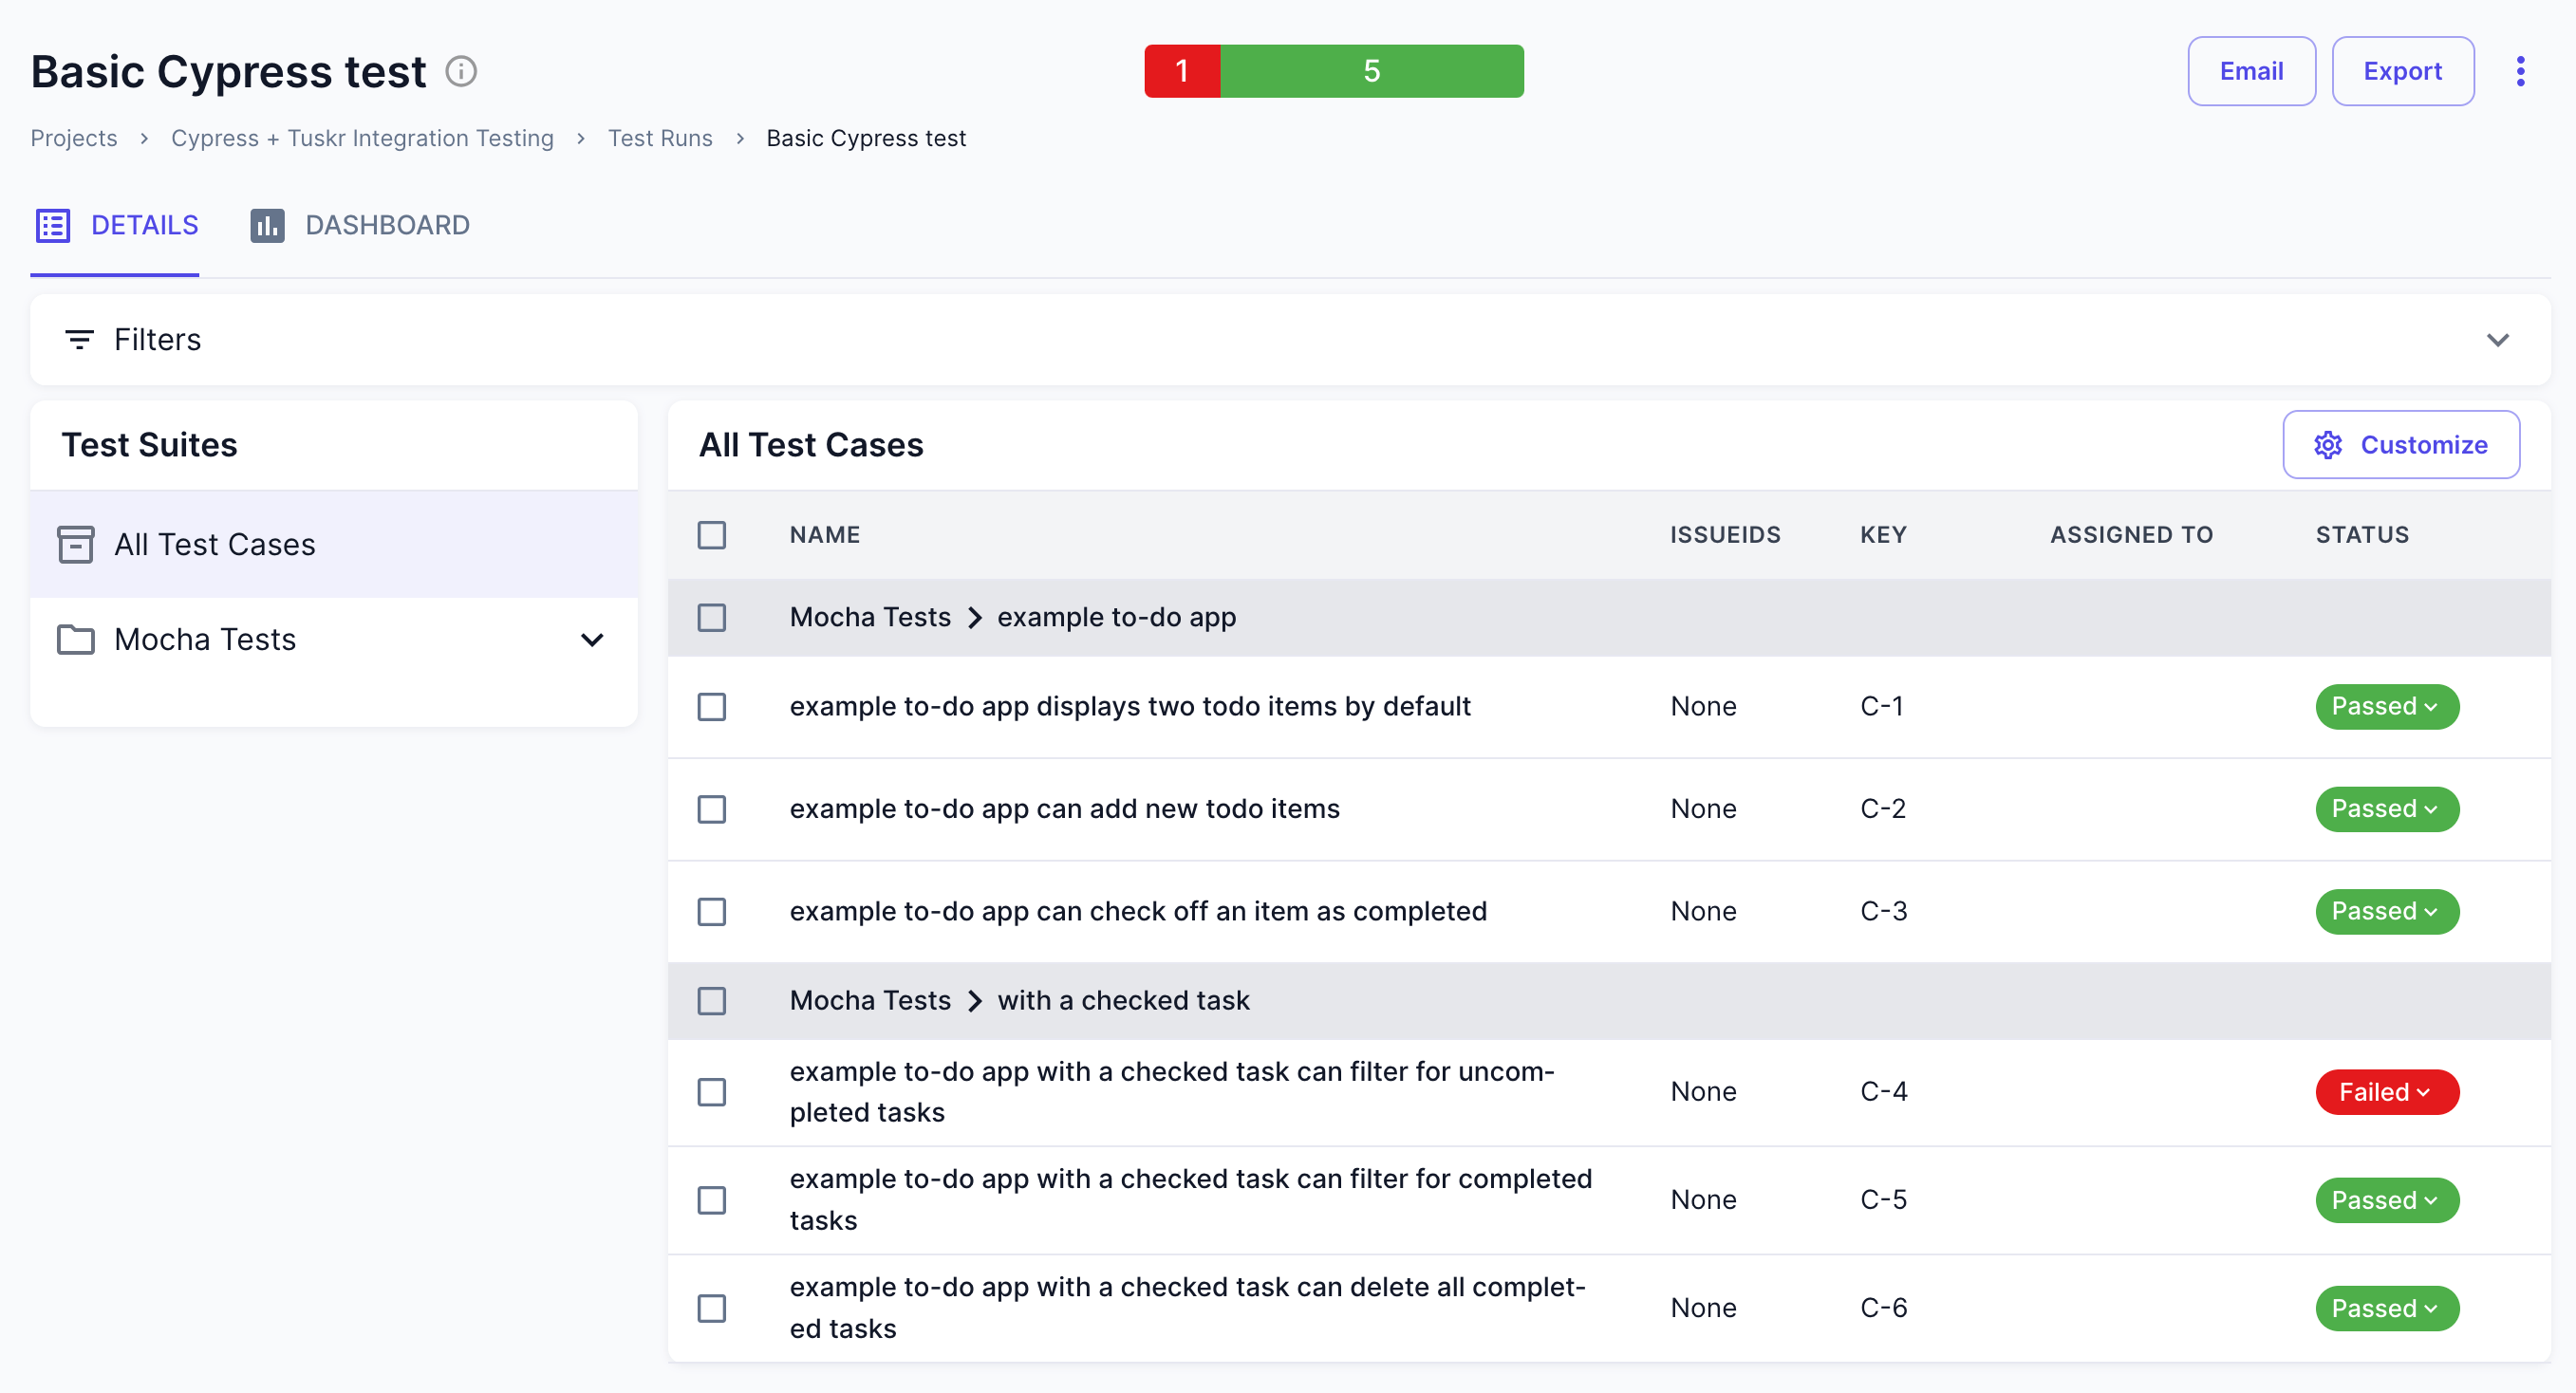
- Click on the failed test case and check the Results section, it will contain error details in the Comments field.
Existing test cases are found based on Automation ID field. If a test case is not found, then the classname and name attributes are combined. For ex., a non-existent test case having classname as login and name as wrong password then its automationId will be login.wrong password


